Using Rhino with Open WebUI
This plugin lets you talk to Rhino in plain language from an Open WebUI chat — “describe the active document”, “make a box 10 by 10 by 10”, “list the layers”. You type in the chat, and Rhino does it. It adds tools to your existing model, so if it is able of advanced reasoning and web search, it can do things like “Take this reference, search the internet for additional material and and model it”
It is an independent, experimental tool developed in-house at HENN. It is not made by McNeel and not by Open WebUI.
Contents
- Read this part first
- What you need before you start
- Setting it up — once
- Using it day to day
- When something goes wrong
- Things worth knowing
- Words you’ll see
Read this part first
When you connect, the chat model can run any command in Rhino, including code, and can read and write files on your computer — anything you could do yourself. There is no “are you sure?” step before each action, and no safe mode.
In practice, that means:
- Save your work before you connect. Try it on a copy of a model first, not on something you care about.
- Only connect to an Open WebUI you trust. Whoever controls it, and whichever model you chat with, effectively has their hands in your Rhino.
- Watch what it does. If you ask it to tidy up a model, it may delete more than you meant.
- Don’t run Rhino as administrator while using this.
If any of that is not acceptable for the machine you are on, stop here.
What you need before you start
- Windows, and Rhino 8. It will not work on a Mac.
- RhinoAI already working in Rhino. Type
MCPStartinto the Rhino command line and press Enter. If Rhino says it doesn’t know that command, you need to install McNeel’s Rhino-MCP-Platform first — that is a separate thing from this plugin, and nothing here works without it. - An Open WebUI you can log into, in a browser on this same computer.
- Open WebUI permissions to create API key and add user-specific integrations, as that is what the tool uses to connect to Open WebUI. You can set the connection manually without an API key, but you need to add user-specific integrations to connect to an MCP server running on your computer.
- The plugin, installed from its
.yakpackage. Once it is installed, a small toolbar with four buttons appears in Rhino: Link, Settings, Monitor, Help. If you don’t see it, typeOpenWebUIRelayToolbarinto the Rhino command line and press Enter.

Setting it up — once
You only do this once. After that, connecting is one click.
Step 1 — Open the settings
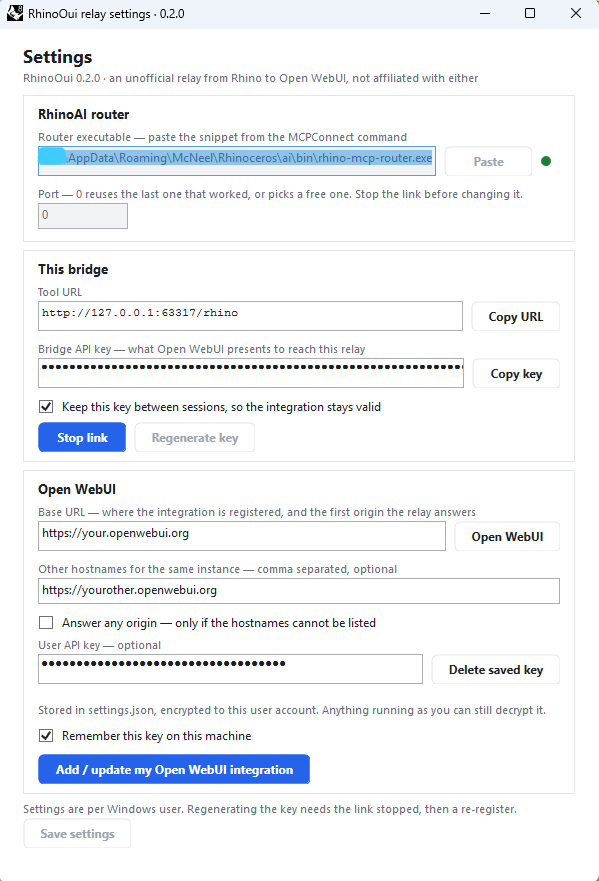
Click Settings on the toolbar.
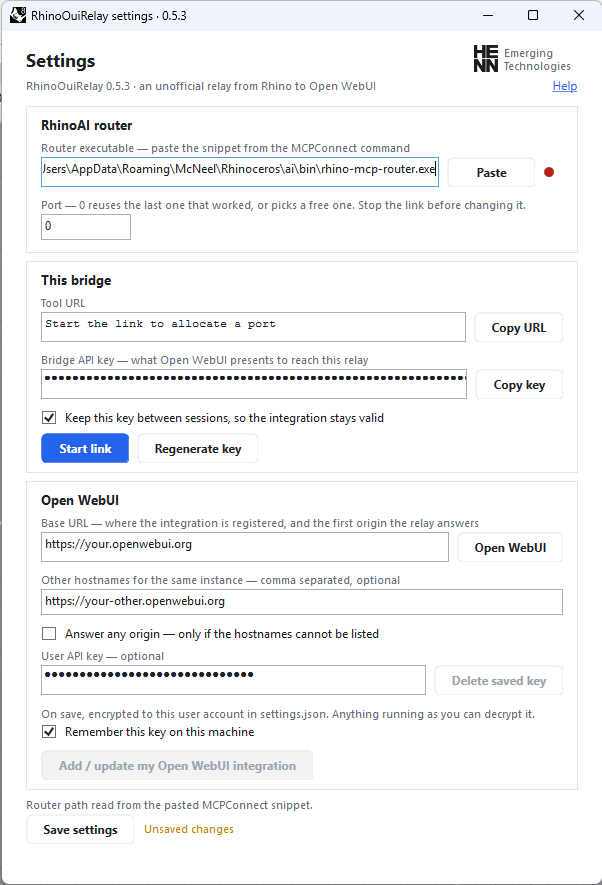
Step 2 — Tell it where RhinoAI is
Look at the top box, RhinoAI router.
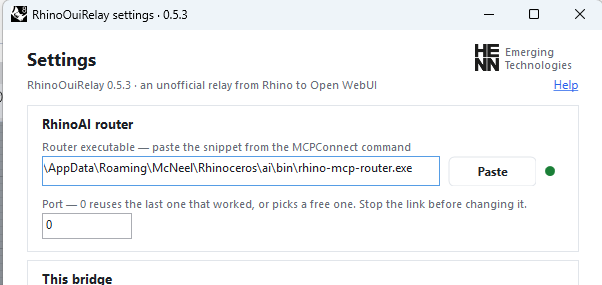
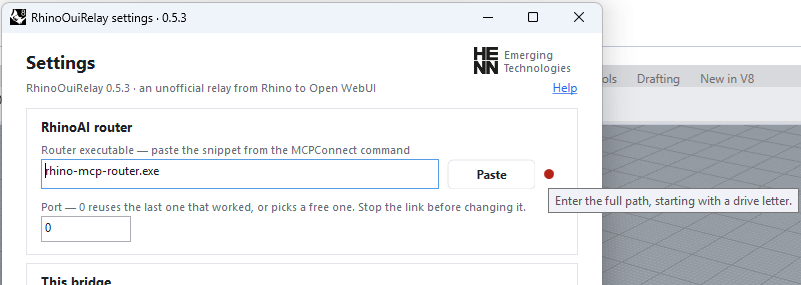
There is a round dot at the right-hand end of the box. Green means it already found it — most people will see green, and can skip to Step 3.
If the dot is red:
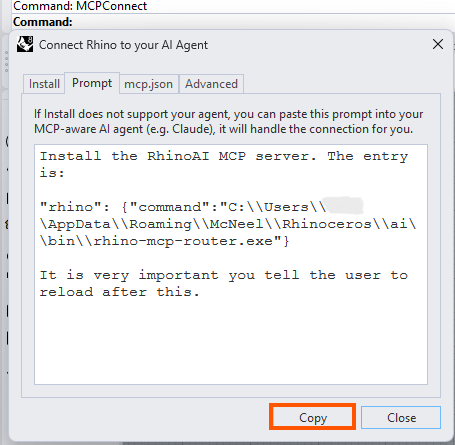
- Go to the Rhino command line, type
MCPConnectand press Enter. - A window appears with a copy button. Click it.
- Come back to Settings, click into the Router executable box and press Ctrl+V — or just click the Paste button next to it.
You can paste the whole block of text it copied. The plugin pulls the one line it needs out of it; you don’t have to find it yourself.
Hover over the dot at any time and it will tell you what it thinks is wrong.
Step 3 — Connect
- Click Start link.
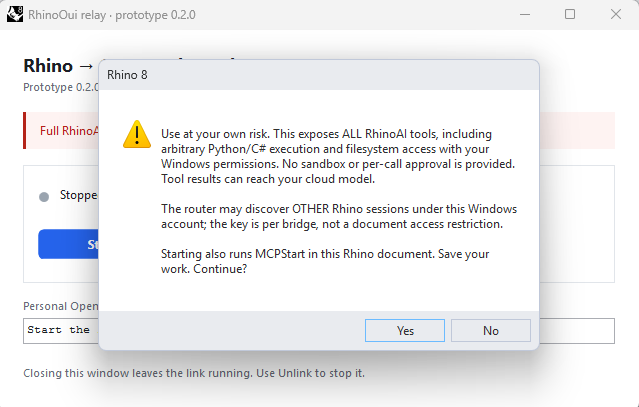
- A warning appears about what the tools can do. Read it, and click Yes if you agree.
It takes a few seconds. When it is connected, the window says it is running and how many tools it found.
Step 4 — Fill in your Open WebUI details
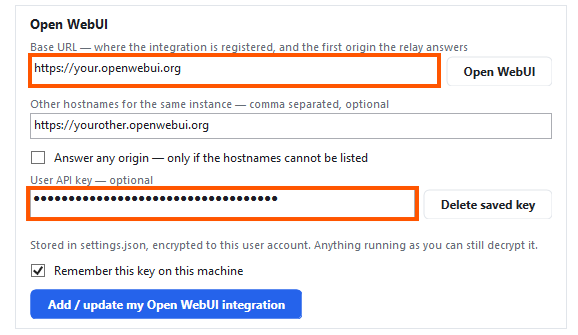
Scroll down to the Open WebUI box.
- Base URL — the web address you normally use for Open WebUI, for example
https://chat.yourcompany.com. Copy it from your browser’s address bar. - User API key — in Open WebUI, click your name at the bottom left → Settings → Account → under API keys, create one and copy it. Paste it here.
If you tick Remember this key on this machine, you won’t have to paste it again next time.
Finally, hit Save Settings
How to enable and create Open Webui API keys - link to OUI official docs
Step 5 — Tell Open WebUI about it
Still in Settings, click Add / update my Open WebUI integration, and confirm.
This hands Open WebUI the address and password it needs to reach Rhino.
Step 6 — Reload your browser
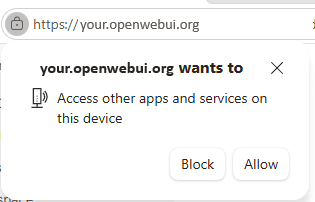
This step is easy to miss and nothing works without it. Go to your Open WebUI tab, reload the page (F5), and start a new chat. If the browser asks for permission to reach devices on your local network, allow it.
Step 7 — Try it
In the new chat, activate the tool
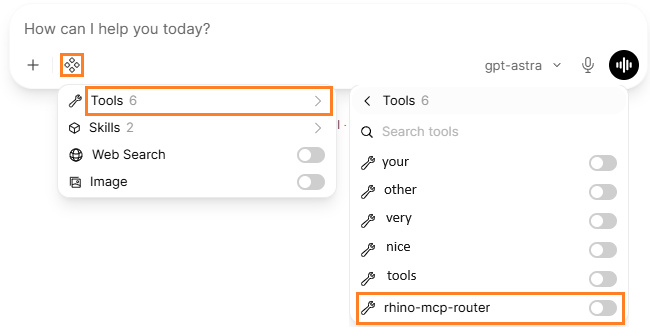
and then type:
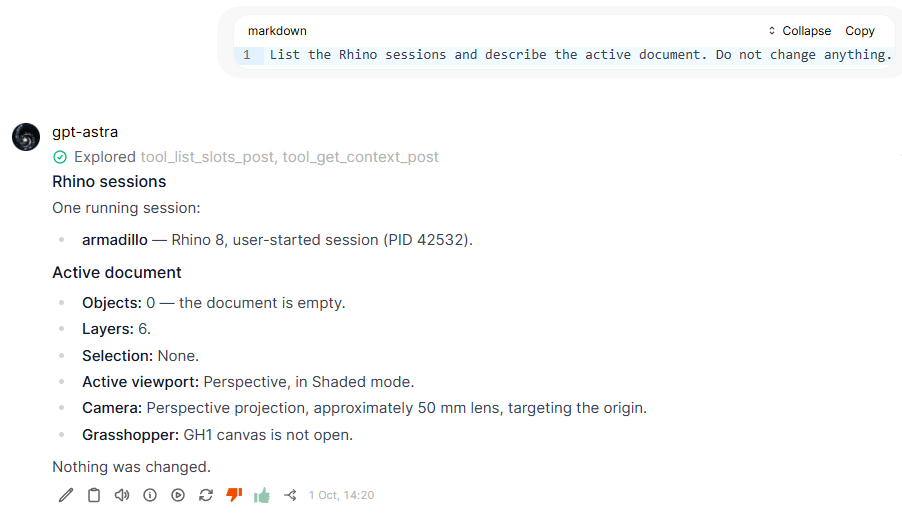
List the Rhino sessions and describe the active document. Do not change anything.
If it answers with something about your model, you’re done.
Using it day to day
- Open Rhino.
- Click Link on the toolbar and accept the warning.
- Go to Open WebUI, activate the tool, and chat.
That’s it. You do not need to repeat the setup, and you do not need to touch the integration again — the plugin keeps the same address and password between sessions on purpose.
When you are finished, click Unlink / stop. Closing Rhino also stops it.
Closing the plugin window does not disconnect it. Use Unlink / stop for that.
When something goes wrong
The dot next to the router box is red
The plugin cannot find RhinoAI. Hover over the dot — it says why. Usually: run MCPConnect in
Rhino, copy what it gives you, and paste it into the box.
Nothing happens when I click Start link, or it reports an error
Run MCPStart in Rhino by hand and see what it says. If that fails, the problem is with RhinoAI,
not with this plugin.
Rhino says it’s connected, but the chat can’t see any Rhino tools
Nearly always one of these, in order of likelihood:
- You didn’t reload the browser. Reload the Open WebUI page and start a new chat.
- You’re on a different web address than the one in Settings. If your Open WebUI answers on
more than one address — say
chat.company.comandwebui.company.com— put the others in Other hostnames for the same instance in Settings and save. You do not need to reconnect. - The browser blocked it. Allow local network access if it asked, and try a different browser if your workplace locks yours down.
It worked yesterday and today it doesn’t
Click Add / update my Open WebUI integration again, then reload the browser. If you clicked Regenerate key at some point, this is expected — that deliberately changes the password and Open WebUI needs telling.
I need to report a problem
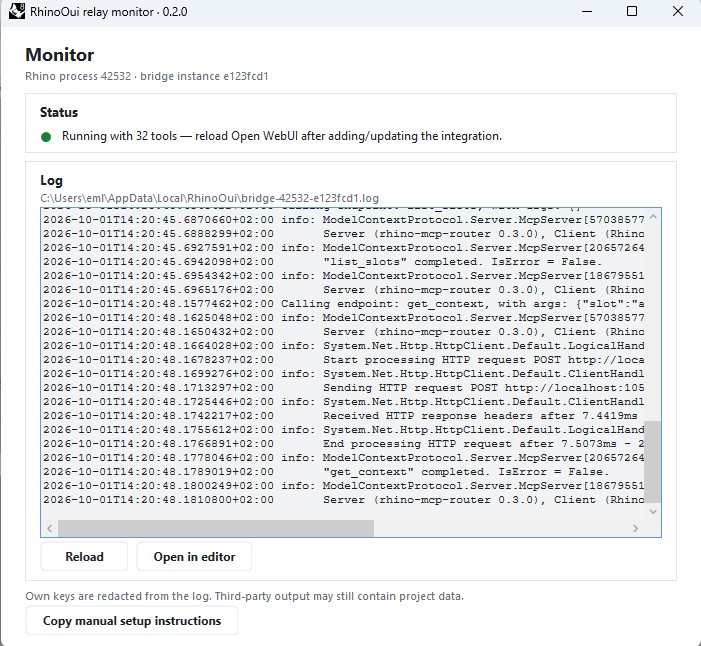
Click Monitor on the toolbar. It shows the status and a log. Use Copy manual setup instructions or Open in editor to get the details, and send those along with what you were doing.
Things worth knowing
It can see other open Rhino windows. If you have several Rhino files open, the model may find and change the wrong one. Ask it which session it is working on before you let it edit anything.
Stopping is not undo. Unlink / stop cuts the connection, but anything already done to your model stays done, and a script that is already running may finish. Use Rhino’s own undo.
It can close other Rhino windows. If RhinoAI opened extra Rhino instances, stopping the link closes those too, and they may lose unsaved work.
Words you’ll see
| In the plugin | What it means |
|---|---|
| Link / Start link | Connect Rhino to Open WebUI |
| Unlink / stop | Disconnect |
| Router | McNeel’s RhinoAI program that this plugin talks to |
| Integration | The entry inside Open WebUI that points back at your Rhino |
| Bridge API key | A password the plugin makes up so only your Open WebUI can reach your Rhino |
| Tool URL | The address on your own computer that Open WebUI calls |